Mounting DigitalOcean Spaces and Access Bucket From Droplet
In this post, I will show you step by step in the easiest way possible how to mount a DigitalOcean Spaces Bucket. Afterwards, you can access it as how you normally access folders on Linux.
The instructions will pretty much work for other S3-compatible storage providers and of course, S3 as well (just some substitutions will be needed).
Note #1: This tutorial assumes that you have a DigitalOcean Spaces bucket, and a Linux server/droplet.
Note #2: If you already have the access & secret keys of your bucket, skip to Step 4.
Table of Contents
Don't waste time, sync buckets between storage providers in a couple of clicks, first 1TB of transfers free!
Sync Your Buckets Using SimpleBackups →
Step 1: Obtain Storage Access Key
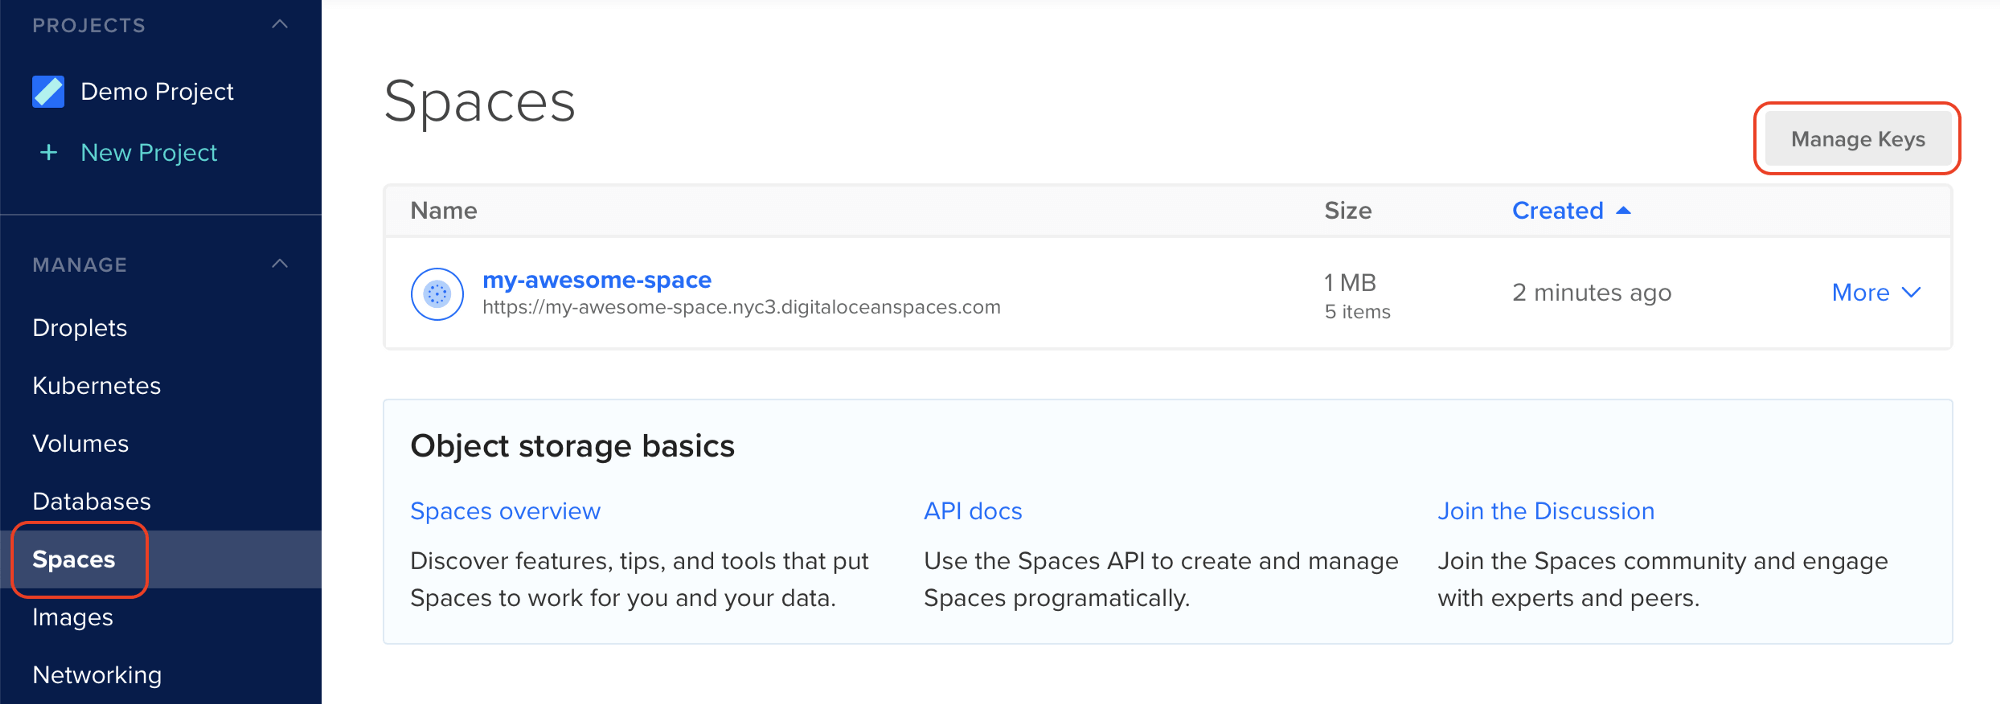
From the Spaces tab on DigitalOcean, click “Manage Keys”

Step 2: Generate a New Key For Spaces
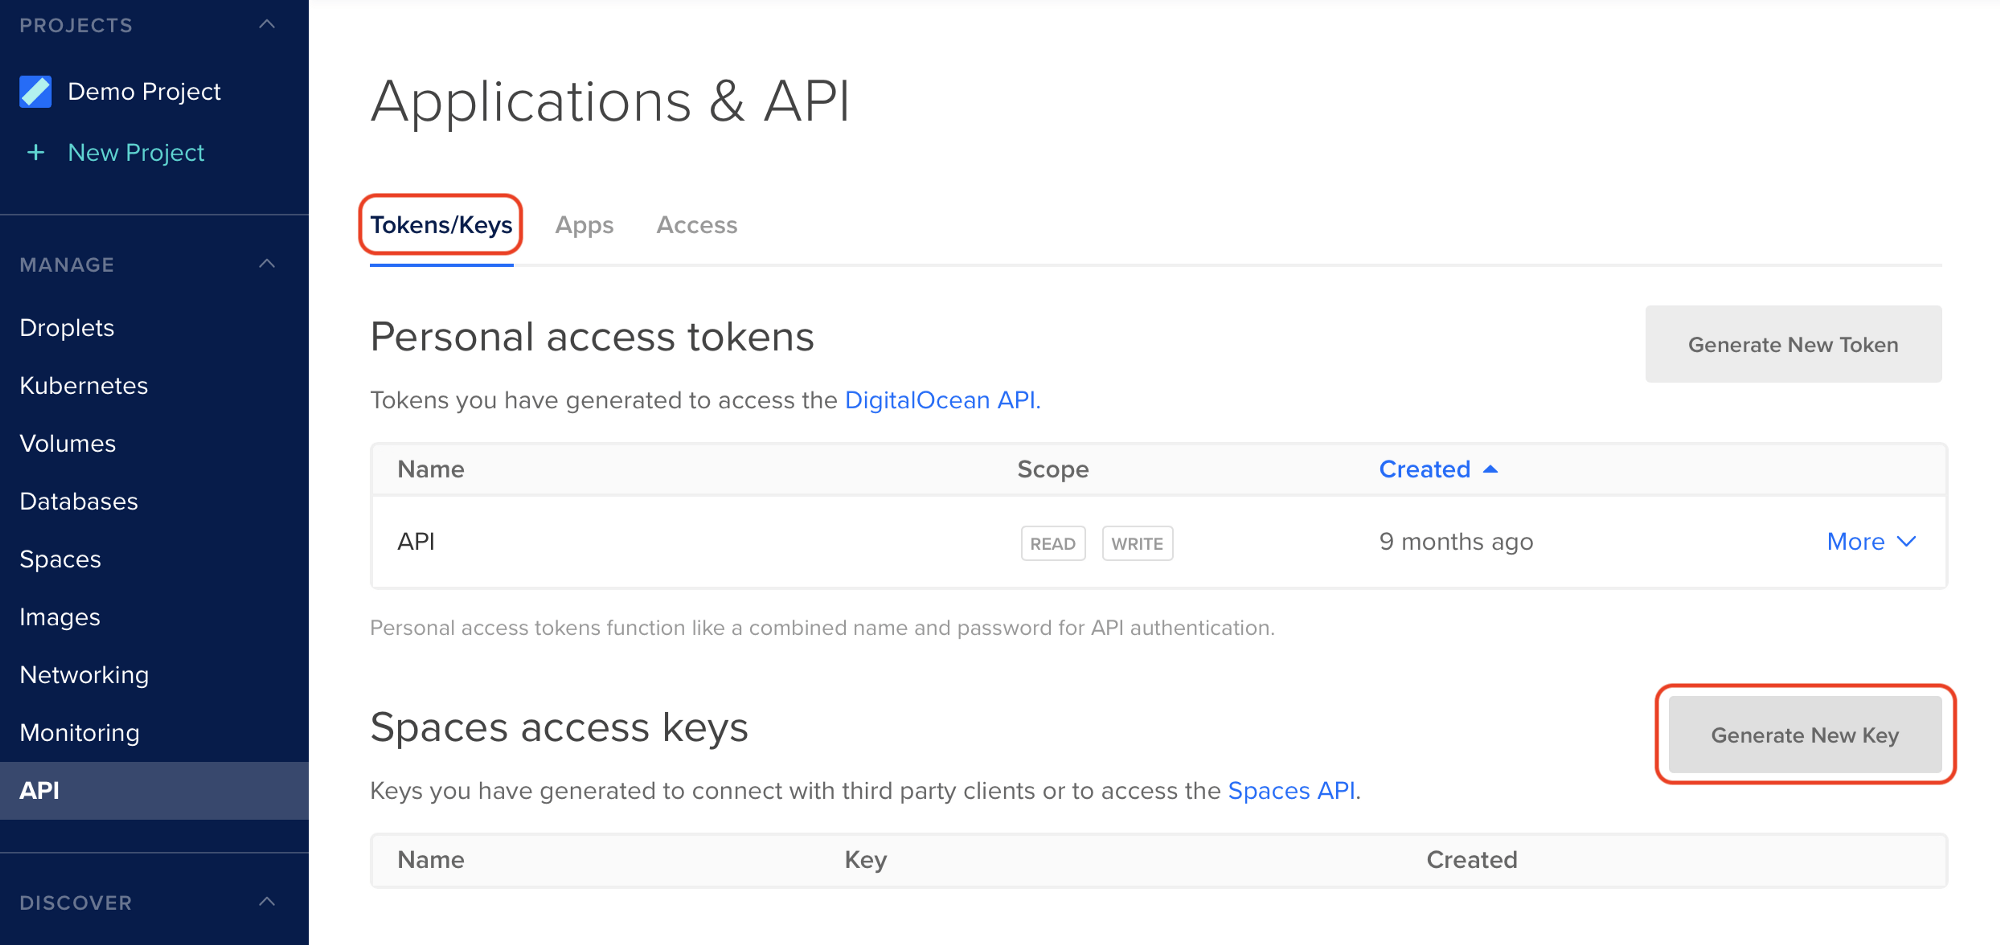
Now click “Generate New Key” from the “Tokens/Keys” tab as shown below:

Step 3: Copy your Access and Secret Keys
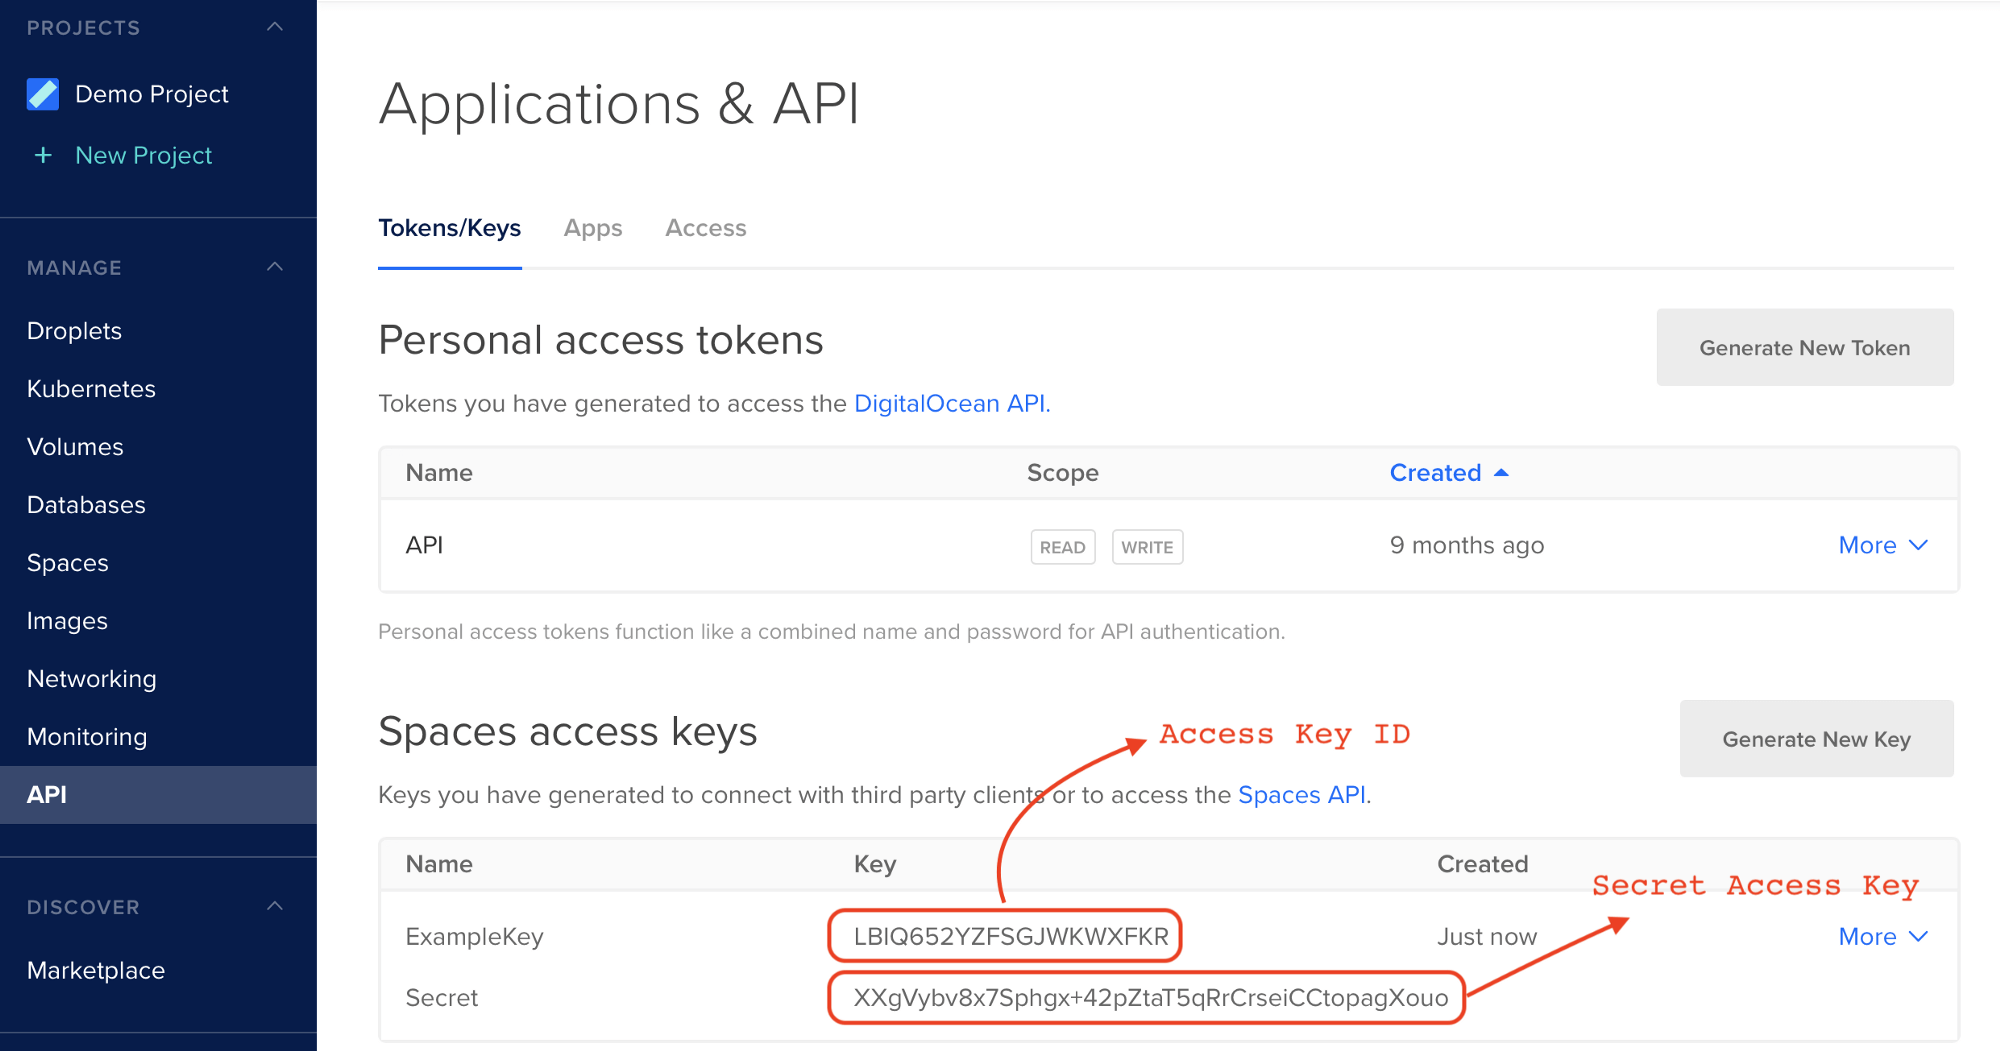
Set a name for your key, then copy the resulting values highlighted below (the ACCESS_KEY_ID and the SECRET_ACCESS_KEY respectively):

Step 4: Install S3FS-Fuse
On your Linux machine, install the tool s3fs-fuse (Ubuntu example below):
sudo apt install s3fsStep 5: Configure your Spaces Key
Use the following command to install your DigitalOcean Spaces key on your machine:
echo ACCESS_KEY_ID:SECRET_ACCESS_KEY > ${HOME}/.passwd-s3fs && chmod 600 ${HOME}/.passwd-s3fsIn this example, using the values in Step 3, replace ACCESS_KEY_ID:SECRET_ACCESS_KEY by LBIQ652YZFSGJWKWXFKR:XXgVybv8x7Sphgx+42pZtaT5qRrCrseiCCtopagXouo
Step 6: Create your Mount Directory
Create the folder where you want to access your bucket:
mkdir -p /media/my-local-bucketStep 7: Mount Your Bucket
Now we just need to mount the bucket on the chosen folder using this single command:
s3fs my-awesome-space /media/my-local-bucket \
-o passwd_file=${HOME}/.passwd-s3fs \
-o url=https://nyc3.digitaloceanspaces.com/ \
-o use_path_request_style
This command mounts our DigitalOcean Spaces bucket named my-awesome-space on the folder /media/my-local-bucket in Linux.
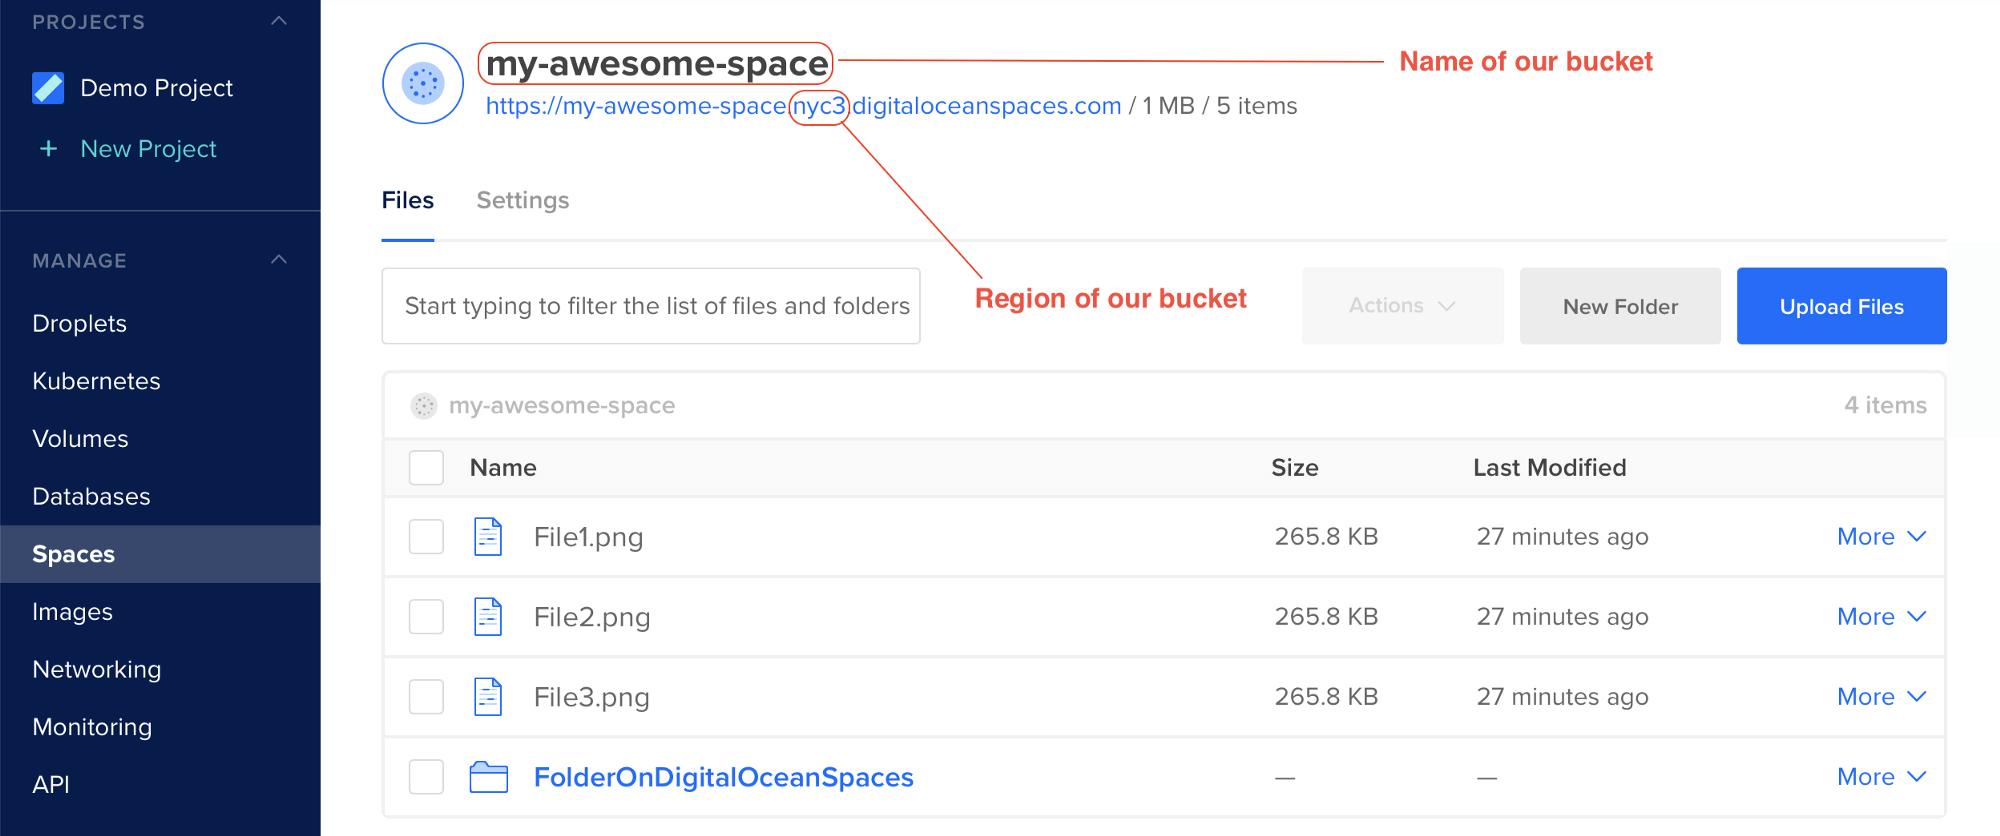
Note: in our example, the bucket is located in nyc3 region. If your bucket is in another region, make sure you replace nyc3 by the correct region. You can find the region and the bucket name as shown below:

Verify That It Works
Finally, you can check the local folder /media/my-local-bucket to verify that it has your DigitalOcean Spaces bucket files and folders! 👏
ls -lah /media/my-local-bucket
Step 8 — Confirmation
In the screenshot above, we locally see the same files and folders seen earlier in Step 7 — this verifies that we can access the bucket as a local folder.
*If you are still unable to make it work repeat the steps and make sure you set the right Bucket region / name.*
You can create a free SimpleBackups account and effortlessly back up your databases, servers and websites with the ability to choose DigitalOcean Spaces and other storage providers as a storage option! Try it out.
Back to blog
Stop worrying about your backups.
Focus on building amazing things!
Free 7-day trial. No credit card required.
Have a question? Need help getting started?
Get in touch via chat or at [email protected]


